Monday, October 21, 2013

Squash and Stretch

Now that you know the basics of animation, let's talk about the principles of animation.

The first of these is: Squash and Stretch.

Squash and Stretch means that objects change shape as they move - this gives the appearance of weight and flexibility to your drawing. Objects change shape, but not overall volume.

Take a look at this video of a golf ball hitting a wall at high speed for an example:
A more subtle example can be seen in the torso of this running cheetah. Look at how it shortens and lengthens from side to side:
Here is a running horse, and an animation, so you can see how the idea of squash and stretch has been applied to the horse's body:
If you'd like, you can watch this comparison of cartoon balls hitting the ground with and without squash and stretch applied:

Assignment

1) Please animate your own ball squashing and stretching as it bounces. The animation should loop, meaning it should play in an endless cycle flawlessly.
To read the article these pictures came from, please visit: http://johnkstuff.blogspot.tw/2006/05/animation-school-lesson-2-squash-and.html

Wednesday, October 16, 2013

Easytoon: Keyframes and In-Betweening

Now that we've had a chance to look at Easytoon, let's talk about the actual process of making an animation. When we start, there are lots of planning steps to consider, but today we'll take a look at keys, or keyframes, and inbetweens. I'll explain it quickly in class, but you may watch this video as well.

For example, if I have a picture of a guy, and I want him to fall down, I might make 2 pictures like this:
  and  
In the first picture, the guy is walking, and in the second he has fallen down.

Knowing where my character is, and where he needs to be, helps me plan accurately not just the motion but also the timing.

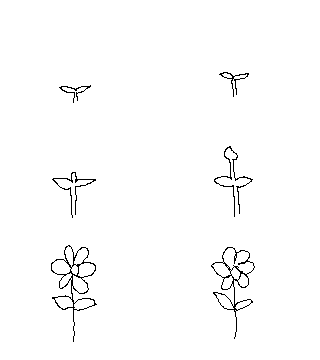
Or what if I want to make a flower grow? I can show it as a seedling first, then as a flower!
 and 


In the first picture, the flower is a seedling, and in the second the flower has grown.

Click here to see the Growing Flower Example

What can we do to make the movement not so jerky????

The answer is 'tweening,' meaning sticking new pictures in-between our other pictures.

In this way, we can we get our flower to move smoothly, like this:

Quickly Growing Flower

Assignment:
  • Please download Falling Guy and Growing Flower, or create your own 2 files with keys of your choice.
  • Show me that you can put about 20-22 new pictures in between the original 2 pictures, to make the animation go more smoothly. 
  • Remember, when you use the 'Insert New Frame' button, the new frame goes BEHIND the picture your'e looking at!
  • Please save your files with the GIF button.
  • Finish both and you may use the rest of your time however you like.

Tuesday, October 15, 2013

Textures and Filters!

Assignment:

1) Watch one of these tutorials about adding textures.
2) Please find and apply 2 textures to your picture. One should be a clipping layer masked onto your base shape, and the other may be a background or whole-scene texture.

Monday, October 7, 2013

Textures and the Final Process!

This week I'll walk you through all of the steps toward making an image that looks like this, in the end:


Please follow along with me as we go through the process! :D


Monday, September 30, 2013

Watercolor - Layer Properties

Assignment:

Please find a reference image of something non-geometrical that you would like to copy; something fairly simple, like a natural object. Some ideas:
    • Smoke Cloud
    • Cloud
    • Ink Drop in Water
    • Hair
    • Tree
    • Rock
  1. Begin to make a sketch of your reference image.
  2. Make a master color layer that we can clip the shadows and lights onto, as separate layers.
  3. Begin making the shadows as a layer set to multiply
  4. Begin making the lights as a layer set to overlay, screen, or luminosity.
  5. Post your progress in your bog (WIP).
Day 2:


  1. Use Layer Texture (Watercolor) and Layer Effect (Fringe) to make your painting look more like a watercolor image.
  2. Use the blur or watercolor tool where you like to alter the look of the painting.

Tuesday, September 17, 2013

Using Clipping or Masking - Concept Art

Now that you have a little bit of a experience with masking, let's put together a project that makes use of masking. Choose or make a character to draw, and we'll make  full picture of it, using color & shading with clipping.

Assignment:
  1. First, choose a subject for your drawing.
  2. Please spend some time setting up the initial layers of a drawing you'd like to color. You'll need to make an initial sketch of what you want to draw, then make a new layer with clean line art. 
    • Check with me when you've finished this step. I want you to have really clean line art. 
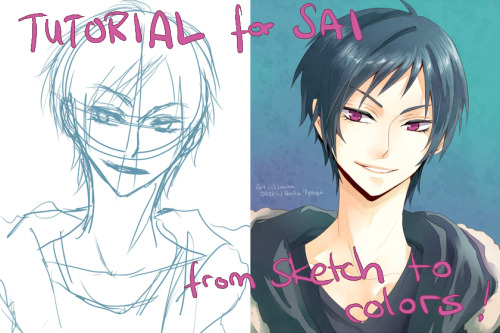
    • If you need a review on how to make clean line art, I'll go over that with you, or you can watch: Lineart Tutorial
  3. Once you're ready to color, begin separating your main colors onto different layers


Clipping Layers & Masking


Because masking and clipping allow us to draw and paint within a limited space, they can be extremely useful techniques to know! If you are following the traditional drawing technique of using: sketch, lines, color, clipping and masking will streamline your process significantly.


Here is a video that shows an example of using clipping layers:
Here's another video that shows how to use masking:
  1. Please further explore clipping and masking. It is important that you at least understand how to use both.
  2. Once you have posted your picture on Deviantart, and I have seen your .SAI file, you are finished for the day!
    • For your next assignment, I'm going to ask you to have clean lineart. If you need a review on how to make clean line art, I'll go over that with you, or you can watch: Lineart Tutorial